Thursday 31 December 2015

New Year's Special on BakingBoutique!

Happy New Year everyone!

I hope you enjoyed Saturday's post on Top 12 recipes of 2015.

 Every New Year, my family and I conjure up a buffet containing a variety of food from all around the world such as mini burgers, mini Jamaican patties ,Swedish bread rolls, Australian mango and prawn skewers and so on. 

This week's recipe is a sweet treat that's suitable for a buffet like mine or a picnic- I found it on this baking website that I'm signed up to called Yummly. You can sign up with an Google account and it's such an awesome website loaded with plenty of tasty recipes and it's the kind of website that's friendly with food lovers, chefs or even baker like myself and many others around the globe!  

For this New Year's bite, you'll need the following:
150g of unrefined golden caster sugar (I used Billington's)
100g of unsalted butter (softened)
2 large eggs
2tsp of lemon juice 
225g of self-raising white flour (I used Allison flour)
2tsp of baking powder
165g of plain yoghurt

Ingredients for the buttercream: 
100g of unsalted butter
100g of mascarpone cheese
350g of unrefined golden icing sugar (again I used Billington's)
1tsp of vanilla extract 


Decorating option:
450g of white chocolate
          Sprinkles


 Equipment required for recipe:

    About 24 cake pop sticks
    Free-standing/handheld mixer
    Round/square baking tin                                                                   Baking Spray


Method into making this New Year's recipe:

As always, pre-heat your oven to 180C/ 160C fan/ Gas mark 4. Lightly grease a 10inch round or square baking tray with non stick baking spray.

Beat butter and sugar together for about 5 minutes until light and fluffy. Once it's the butter and sugar batter is fluffy and light, lower the speed to medium and continue to mix.

Add the eggs one at a time. Throw in the lemon zest and juice then combine the flour and baking powder together before sifting.

On low speed, add the ingredients and the yoghurt alternately: 3 parts flour, 2 parts yoghurt. Make sure to begin and end with the flour.

Pour the mixture into the pan just over halfway and bake for 35-40mins or until a skewer is pierced into the centre of the cake and comes out clean. Leave to cool.

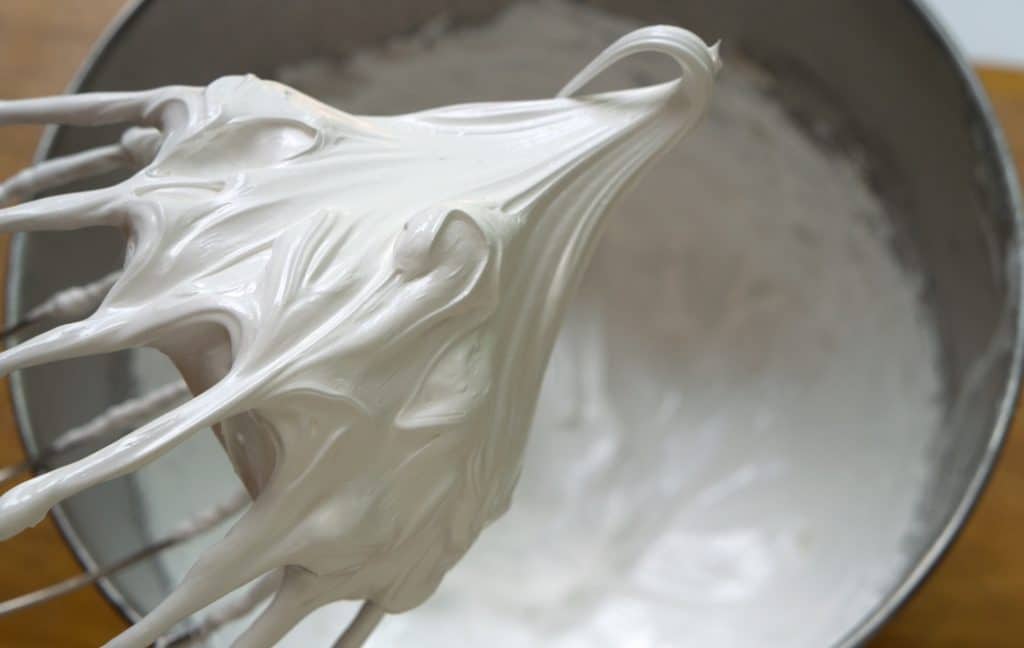
In order to whip up the butter-cream , beat the butter and mascarpone cheese together until well combined.

Gradually, add the icing sugar until smooth and then beat in the vanilla extract. 


Once the cake is completely cool, crumble it using either your fingers or a food processor. Mix the cake crumbs with the butter-cream until you get a dough-like consistency that you can easily mould into balls. Wrap and refrigerate for 1hr.

Line a baking tray with parchment paper. Remove cake pop mixture from fridge and begin rolling into small balls-they should fit comfortably into the palm of your hand.

Place cake balls onto the tray and place back in the fridge for a further 10 mins or until the balls are firm.

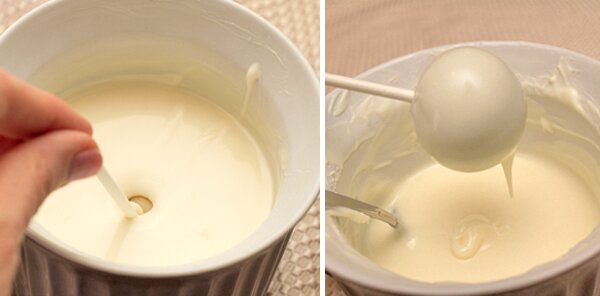
Remove balls from fridge. Then, over a pan of simmering water, melt a small amount of chocolate in a heatproof/microwavable bowl.

Dip the end of each stick into the chocolate around 2cm in. Insert a stick into the centre of each cake ball. Now you're ready to add the finishing touches to your lemoney cake pops.

Melt the remaining chocolate. Holding by the stick , dip each cake ball into the chocolate until completely covered. Gently, tap off any excess. Decorate cake pops with sprinkles of your choice. 

And there you have it! Your ending result should be mouth-watering lemon cake pops!

I hope you have a happy New Year, fix up an AWESOME buffet, check out the website Yummly and not find it too difficult to think of New Year Resolutions (I already know what mine are). 


Happy New Year once again!


#sweetreats xxx


Saturday 26 December 2015

LAST Festive Blog Post No.9 of the year!

Hiya fellow bakers!

I hope you have had a merry Christmas full of positivity, fun and PLENTY of baking (yesterday my family and I ate the hot chocolate cake I  baked on Christmas Eve; the recipe was posted on the same day). 

Today's recipe is the FINAL blog post of the year (don't worry- on New Year's Eve I'll post a New Year's Special) and I thought what better way to end this baking term by listing 2015 Top Twelve sweet treat recipes (selected by me)! I hope you agree with my chosen recipes and like them as much as I do! 

My top-TWELVE sweet treat recipes start with:

1) January: New Year's Cake- Everyone always loves a New Year's Cake to celebrate the new year. I feel like this is such a special sweet treat only because it shows how special and important the New Year actually is.

2) February: Gluten-Free Venetian Carrot Cake- one Monday (in February this year, I can't remember what the channel's
called) at around 8.p.m, I were watching Nigella's Kitchen and I saw her make this cake and it just looked so... delicious, it made my mouth water and hmm..just it was so satisfying and definitely  a must-have recipe for February- later on next  year, I might upload this recipe onto BakingBoutique-keep your eyes open for that if you're interested. 

3) March: Flower Surprise Cupcakes- I found this  cupcake recipe surprisingly in a book written by Cathy Cassidy. This
book is called The Chocolate Box Secrets and it's filled with recipes, D-I-Y activities and crafts and it's just such a lovely book to have. It's very handy, useful and you learn something from reading it.

4) April: Bake well Tart- I always love to eat a home-made bake-well tart in April because April is that time of year when the weather becomes warmer BUT it's still
cold and I find that this recipe relates to that because it contains summer fruits but it can be served on  a cold day.


5) May: Whisked Victoria Sponge- I chose this recipe for this month because:
1. I've definitely eaten  this cake sometime in May.
2. I chose this recipe because it contains the jam of one of my FAVOURITE summer fruits.
3.You'll definitely see this cake somewhere at a summer tea party.


6) June: Picnic brownies- I absolutely love picnic brownies. They're so delicious, fun to bake and just quite a summery sweet treat even though I eat a dozen of them and then have to gulp down a whole glass                                       of water. 


7) July: Strawberry and Almond Crumble- I was going through the BBC Food website because I wanted to make something to celebrate my leap from primary to secondary and I found this recipe. It's not a difficult recipe and it tasted great! 
 The link for this recipe is: 
 http://www.bbc.co.uk/food/recipes/strawberry_and_almond_38519

8) August: Summer Pudding - Once again I found this summer recipe in the  book "The Chocolate Box Secrets". It's pretty simple but the results are AMAZING!

9) September: Fairy Cakes- I chose fairy cakes as SEPTEMBER'S highlight recipe because
this was the month where I'd bake ALOT of fairy cakes. Some batches were successful(maybe three, two...or ONE batch) and there were other that were unsuccessful (most of them were). That's why there is NO way those fairy cakes in the picture above are mine.


10) October: Star-shaped cinnamon biscuits- I have picked biscuits for October because the weather begins to change and so do the seasons . And personally I feel cinnamon does a good
job of comforting and helping you get used to all of the changes even though cinnamon is better suited for Winter and not Autumn.

November: BBQ Parkin- Yes for November's recipe I have picked one of my own recipes. I find that BBQ Parkin is a very festive and November- inspired recipe, especially if it's traditionally eaten on Bonfire Night. Besides, it gives me an excuse to invite friends round and  hold a BBQ!

December: Rich Fruit Christmas Cake
(obviously)- I was hard to choose between Christmas Pudding or Christmas Cake for December but I feel that Christmas Cake is more traditional in my opinion and it gives that festive feel and vibe when you eat it. Besides, it's a lovely cake to bake!


Thanks you SO much for viewing my blog and staying tuned EVERY week for new post this year.I hope you've enjoyed my recipes as well as been inspired to bake more often. 

Please comment on my Top Twelve sweet treat recipe list and let me know whether you disagree or not. If you have any suggested recipes that you'd like me to post for next year, please e-mail me to: chocolatecupcakes08@gmail.com with the title of the e-mail "Suggested Recipe".

I hope you've had a wonderful Christmas and have a happy New Year and don't forget to check out BakingBoutique next week for a New Year's Special!

See ya,

#sweetreats xxx


Thursday 24 December 2015

Festive recipe post No.8- Hot chocolate cake

Greetings lovers of baking!

For today's recipe, I was actually inspired from yesterday night at around 11:15 p.m. At this time I were beginning preparations to decorating my room festively. All of a sudden I felt in need of a sweet treat. I don't know why but there are just times when I'm in need of something sweet. Do you ever feel like that? In desperate need of something to eat, I go downstairs to the kitchen and into the cupboards and find drinking chocolate powder and these unusual Ikea biscuits. For some reason, my imaginative and creative side wanted to experiment with these ingredients. SO FIRSTLY I crumbled the Ikea biscuits into the mug THEN I spooned to cocoa powder, poured in milk and stirred the liquid together before placing in the microwave for 1 minute and a half. I take it out, drink it and IMMEDIATELY fall in love with my creation. And that's how I got my inspiration for today's recipe.


Especially during this cold, blustery season, hot chocolate never fails to comfort and warm you on the inside. And I figured if HOT CHOCOLATE can comfort, why can't hot chocolate CAKE?!

In order to make this inventive cake, you'll need:

150g of self-raising flour

75g of drinking chocolate powder

2tps of baking powder

180g of caster sugar

200g of margarine at room temp (I used Stork)

3 large eggs

Ingredients for chocolate ganache:

225g of of chocolate of your choice, broken into pieces

125ml of double cream

150g of soft, UNSALTED butter

225g of icing sugar


Method into making this delicious, inspirational cake: 

Before you touch ANY ingredients, pre-heat your oven to 180C/350F/Gas Mark 4.

From there, grease and line two sandwich cake tins 23cm (9in).

Mix together the caster sugar, margarine,self-raising flour, drinking chocolate powder and 3 large eggs for at least 3 minutes until light & fluffy.

Add 3 tablespoons of hot water to the cake mix and whisk again for a further 3 minutes until the cake mixture is extremely light.

Divide the cake mixture into the two separate tins.

Bake for 20-30 mins until the sponges are firm to touch and springs back when you press it.

Transfer cakes onto a cooling rack for 7-10 minutes before filling and icing.

In order to create a creamy and chocolatey butter-cream , first sit a bowl over a pan of simmering water then add the chosen chocolate and double cream to the bowl and gently melt until stirred smooth. Remove from the heat, add the softened butter to the melted mixture and stir until smooth.

Sift in half of icing sugar and mix. Add the remaining sugar and mix until as smooth as caramel in a Galaxy Caramel Collection (once again).


Set aside to cool until thick 

When the icing is set, spread half of the chocolate butter-cream over one of the chocolate cakes before placing the other cake on top of the iced cake.

Serving Suggestion by me: Eat with hot cocoa on a cold, blustery day.

And that's all for today's blog post. Stay tuned this Saturday for more Christmas Baking and don't forget to comment on my inspirational story whoever is looking at my blog. 

Have an awesome time baking this cake!

#sweetreats


Saturday 19 December 2015

Festive Recipe Post No.7- Apple & Cinnamon Traybake

Hello to all festive bakers this Christmas!

I am just SO happy to be back into blogging  as well as back into baking at this time of the year. Speaking of this time of the year...it's only 6  days until Christmas!!!! I've already begun decorating my household and I'm beginning to transform my room into Santa's Grotto! It so unbelievable how the weeks fly by as well as the time. Going back to the topic of CHRISTMASSS, this week's recipe continues with the festive theme and gives you the feeling (and taste) that Christmas is almost here!

In order to bake this gorgeous and Christmassy traybake, you'll need the following:
400g of cooking apples(or ones in your garden)
125g of unsalted butter (I've recently learnt that cakes taste better when you use unsalted than they do when you use ordinary butter-I thought both tasted just as nice)
1 medium- sized egg
1tsp of vanilla extract
175g of plain flour
2 heaped tsp of baking powder
175ml of whole milk (it's less than you think)
25g of demerara sugar 
 And of course...
Ground cinnamon for dusting and decorating (with this recipe I also sprinkled a little cinnamon powder into the mix for that extra Christmassy taste)

Method to making this Apple Cinnamon Square:

Before you touch ANY ingredients, preheat your oven to 180C/160Cfan/gas mark 4 and butter a 23 cm (9in) sqaure x 4cm (1 1/2in) deepp brownie tin or equivalent.

Peel, quarter AND core apples & thinly slice (please ask for an adult's assistance if doing this under the age of 11).


Once you've completed step 1 & 2, cream the butter and sugar together in a bowl  together, then incorporate the egg and vanilla extract. Sift together the flour and baking powder and add half of it to the batter followed by half the milk. Combine these ingredients together until you get a SMOOTH mix. Repeat this step with the remaining ingredients.


Smooth half of the cake mixture with a spatula (I put the Bethy Crocker Baking Kit on my Christmas Wishlist- it has a really pretty spatula), lay half  the apple slices on top and then repeat.

Scatter over demerara sugar and dust with a little cinnamon. Bake in the preheated oven for 45 minutes until golden brown, risen or if you poke a skewer into the middle of the cake and it comes out clean. 


Run a blunt knife around the edges of the tin and leave the sponge to cool before cutting into squares


And there you have it- another festive favourite!

I hope you have fun baking this recipe with family & friends and enjoy the results at the end too!

Please do comment this recipe below and let me know what you think about this week's recipe.Also e-mail me about how you got on with this recipe and  if there are any suggestions on what I should put on this blog next.  My e-mail address is : chocolatecupcakes08@gmail.com  
But for now have a happy Christmas and a happy new year and stay tuned to Baking Boutique!


Merry Christmas!   :)

#sweetreats 

Saturday 21 November 2015

Recipe Post No.6- Chocolate Orange Cookies( it's time to get festive)

 Hello festive bakers!

Seeing as it's only a couple of days till December , I thought I should begin giving BakingBoutique's recipes a... FESTIVE theme. And I thought the perfect way  to start that theme would be with cookies. But not ANY ordinary cookies... the CHOCOLATEY- ORANGE type ! I love this recipe probably because it has a lot of festivity AND because it's generally scrumptious as well as easy!


In order to make these delish, festive cookies, you'll need the following:

125g of dark chocolate (I used plain dark chocolate)

150g of plain flour (please do NOT use self-raising flour instead for this recipe)

30g of cocoa powder (preferably ones suitable for baking)

1 tsp of bicarbonate soda 

1/2 tsp salt

125g of butter, softened to room temp.

75g light brown sugar

50g caster sugar

Finely grated zest of one large orange

1 egg, cold

200g of white chocolate ( I didn't add white chocolate to my biscuits only because I HATE white chocolate but it might be different for you)

Equipment needed:
Heat-proof bowl (for placing and melting the dark chocolate)
Small pan/ microwave for melting the chocolate
 Medium- sized mixing bowl
Cooling rack
Large baking sheet
Wooden spoon
Ordinary spoon for stirring the melted chocolate.


Method to making these sweet treats:

Firstly, as always, pre-heat the oven  to 170 degrees/ gas mark 3. Line the baking tray with a  large baking sheet.

Once that's done, melt the dark chocolate in a microwave in 30 seconds blasts. An alternative
would be melting the chocolate over a pan of barely simmering water until melted completely. After that, remove from heat and leave to cool.

While the chocolate is cooling, place the flour, cocoa powder, bicarbonate soda and salt into the mixing bowl and leave aside. 

From there, cream the butter and sugar together in a bowl until light and fluffy. Tip: Don't over- mix- try and cream for roughly three minutes. 

Add the cooled melted chocolate and beat combine.

Beat in the orange zest and egg, followed by the flour mixture. Combined together, stir in the white chocolate chunks( this is optional unless you LOVE white chocolate).

Roll the dough into small or large balls- it depends on the size you want your biscuits to be
and place onto the baking tray. Bake for about 15-18 minutes or until a skewer inserted comes out clean in the middle of the biscuit.

Finally after waiting for 15 minutes, remove biscuits from the oven and leave to cool on the tray for 5 minutes before transporting them to a wire rack. 


(optional) Just to make the biscuits look ESPECIALLY tasty and well...sweet, I added whipped chocolate butter-cream icing and sprinkles- yum!


And that's the recipe for making festive, ADDICTIVE chocolate-orange cookies!

Please do let me know how you got in making these cookies by e-mailing me to: chocolatecupcakes08@gmail.com or by commenting below.

I hope you've enjoyed this week's recipe. Until now...


Keep baking!

#sweetreats 


Saturday 14 November 2015

BakingPost no.5- Icing Techniques


 It has already been a week since my last post, BBQ Parkin, on BakingBoutique. For this week's recipe....it's a little different. I thought I should teach you a couple of icing techniques so you grow as a baker both professionally and deliciously.

So without further ado, here are some of the basics in icing:

Basics

Correct bag position (right handers)

When holding an icing bag , you need to make sure that you're holding the bag at a certain angle. The two most basic angles of holding an icing bag is 90 degrees or straight up. This angle normally is used for icing  flat petal flowers or stars. 

The second method is icing from a 45 degrees angle or halfway vertical and horizontal. By icing at THIS angle, it's used for writing and borders.


Direction for icing right-handed:
The easiest way to learn the direction of an icing bag is when you think the back of the piping bag as the hour hand of the clock- you can sweep out a circle with the back end of the icing bag. Imagine the circle you pictured in the air is a clock face. The hours on the clock face correspond to the direction the point the end of the bag.
Note: Right-handers should always decorate from left to right.

Correct bag position( left handers)
The two basic positions for icing with your right hand is the same for your left hand.


Directions for icing left- handed:
Again, the directions for right hands is exactly the same for left-handers- imagine the back of the icing bag as a hour hand on a clock. 

Note: Left-handers should decorate from right to left. One exception is writing and printing; everyone writes and prints from left to right.

Try practising these bag positions-you WILL get better. It took me some time to get these positions right but after a while I FINALLY picked up the position.  
I know it is quite boring learning about the basics and not actually learning how to prettily ice a cupcake or a biscuit but to ice prettily you MUST know the basics. Like how to fill a icing bag correctly.

In order to perfect this, holding the actual bag correctly is one of the most important steps- make sure when you're holding the bag with one hand, you fold down the top with the other hand to create a generous cuff over your hand as shown below. 

 The second most important step is filling the bag accurately. With an angled spatula/ wooden spoon, fill the bag with roughly half a cup of icing.
(tip) It's essential not to OVERFILL the bag otherwise, excess icing may squeeze out the wrong end.

The next step in filling an icing bag is to CAREFULLY remove the spatula/wooden spoon from the piping bag.
Begin with removing the icing from the spatula by squeezing the bag with your thumb and fingers against the spatula and afterwards pulling it out.

 Finally, to close the icing bag correctly, unfold the cuff and twisting the bag closed- by doing this technique,it forces the icing down into the bag.


Icing consistency is very important when icing with a piping bag and also is important for the type of sweet treat that you ARE icing.

There are three types of icing for three different decorating purposes:

Type 1: Stiff Icing- used for sculpturing shapes and decorations for treats such as cakes and biscuits.

Type 2:Medium icing- used for decorations such as stars, borders and flowers with flat petals. 
(tip) Add water or preferably milk for the right consistency.


Type 3: Thin icing- used for writing, borders and decorations such as leaves, vines 

And those are some of the most important basics when it comes to icing.

At last,I'm going to explain to you how to cupcake icing tip,

steps:


Step 1: Star

Hold bag at a 90° angle 
about 1/4 inch above 
cupcake surface. Squeeze 
letting the icing build up to 
make the star shape. Stop 
squeezing then lift the tip 
away.


Step 2: Twisted Star


Turn your wrist in toward 
you before piping. Hold 
bag 
at a 90° angle. You will turn 
wrist a full twist, slowly 
turning your hand as icing 
pipes out of the decorating 
bag. Stop squeezing and 
lift 
the tip away.


Step 3: Swirl/Rosette


Keeping the tip slightly 
above the surface, squeeze 
out icing to form a star. 
Without releasing the 
pressure on the bag, move 
the tip in a tight complete 
rotation, starting at 9:00, 
moving to 12:00, then to 
3:00 and 6:00, ending back 
at 9:00. Stop pressure and 
lift tip away. Swirls can be 
sprayed with Color Mist 
color, dusted with Pearl 
Dust or Color Dust, or left 
plain.


And that's it for now on Icing Techniques (though I WILL post another  on icing techniques in the nearby future).


But for now, keep on practising and please DO comment on this week's post or e-mail me to: chocolatecupcakes08@gmail.com.

Keep ICING!

#sweetreats